
Your Journey Begins: Understanding the Landscape
Developing workflows is a process of capturing all relevant information that goes into the process:
-
Who is involved
-
What they’re responsible for
-
How tasks are handed off
-
Which tasks are manual and which are automated
As you embark on your BPMN (Business Process Model and Notation) journey, you’ll discover that what seems complex at first is actually built on simple, intuitive foundations.
Phase 1: Overcoming the Learning Curve
The Myth of Complexity
Many critics of BPMN 2.0 complain that BPMN is too complicated to learn, particularly the many notations to be memorized. What the critics failed to mention is that most processes do not require the modeler to know the entire specification. In fact, most models don’t use more than a handful of the most common process elements.
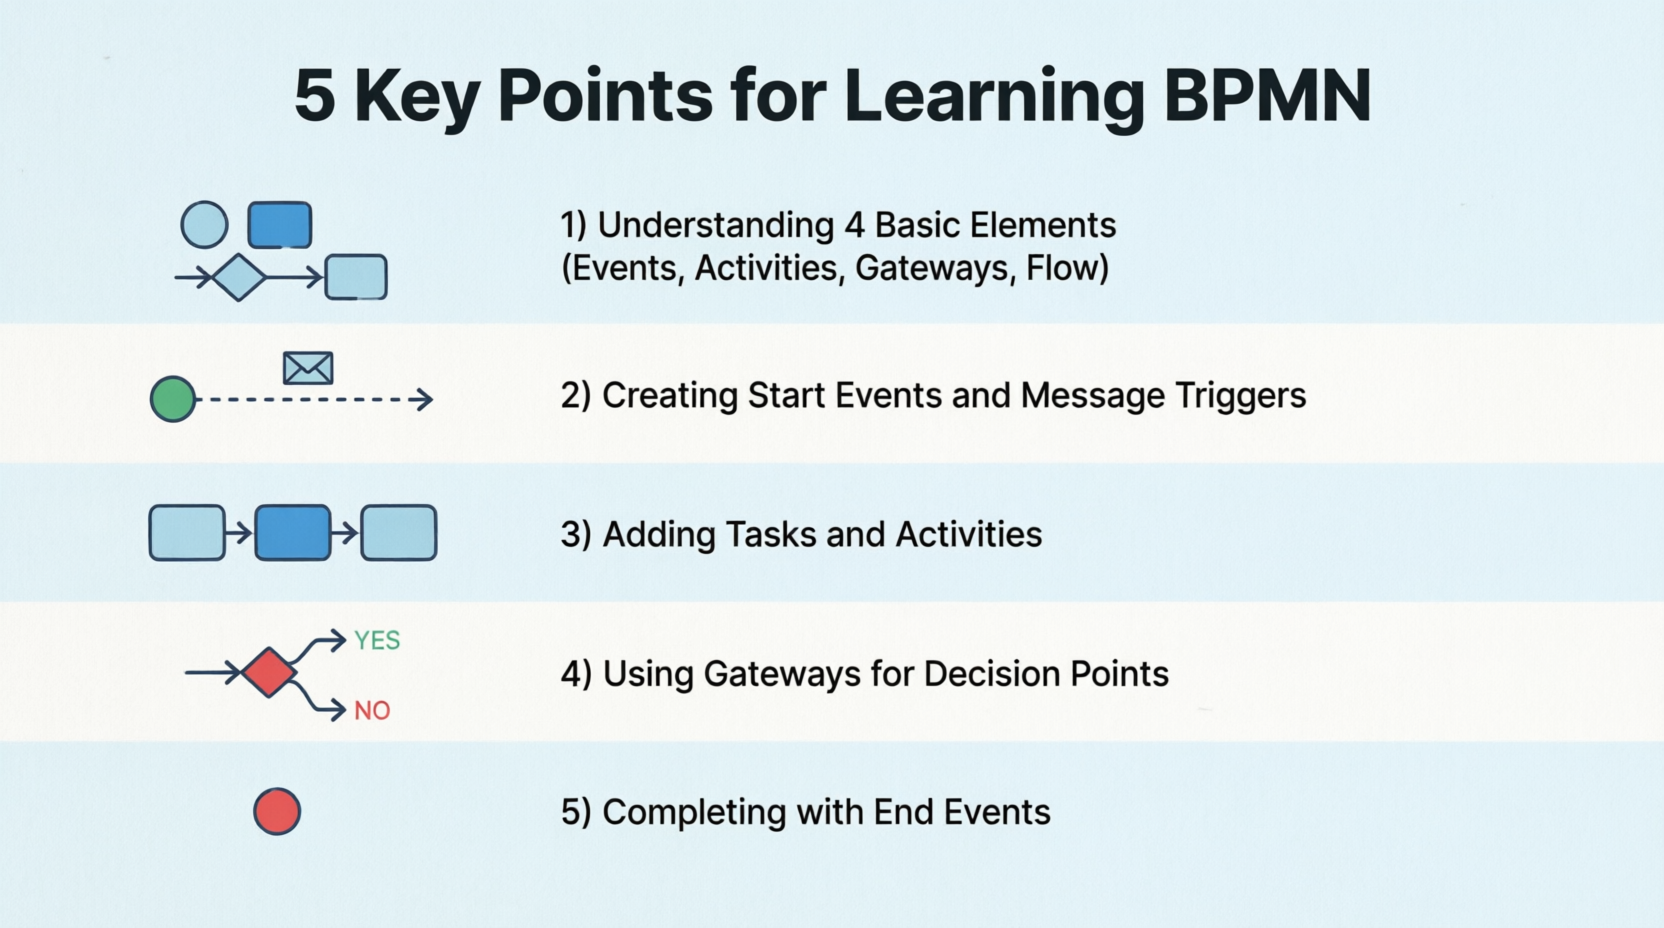
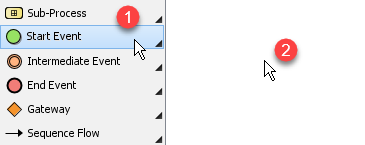
The Beautiful Simplicity: BPMN consists of only 3 basic types of elements plus 1 flow connector element:
-
Events – Things that happen
-
Activities – Work that gets done
-
Gateways – Decision points
-
Flow – The connections (Sequence Flow – the black lines with arrows that connect everything together)
Yes, that’s it! While each of these four elements has its own variants, mastering these core concepts is your first victory.
Phase 2: Creating Your First Business Process Diagram
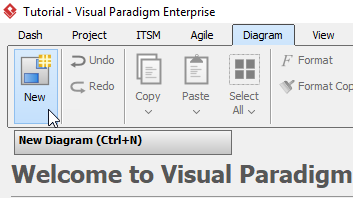
Step 1: Setting Up Your Canvas
Your journey begins by creating a new diagram. Select Diagram > New from the toolbar.
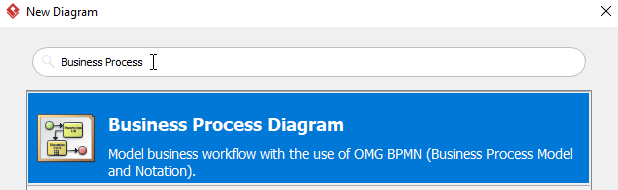
In the New Diagram window, select Business Process Diagram, then click Next. You can use the Search bar above to filter results.
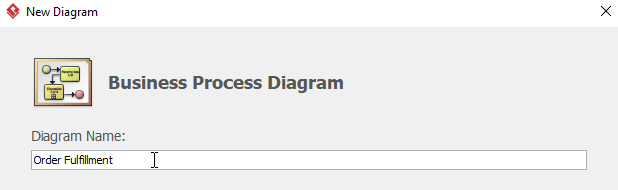
Step 2: Naming Your Journey
Name the diagram then click OK. In this tutorial, we name the diagram Order Fulfillment.
Phase 3: Initiating the Process Flow
Step 3: The Starting Point
To create a start event, select Start Event, then click the location where you want the start event to be placed.
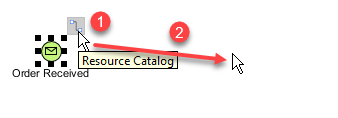
Step 4: Adding Context with Message Triggers
However, we want a message start event instead of a plain start event. Right-click the start event > Trigger > Message Trigger to make it a Message Start Event.

Pro Tip: Don’t forget to name the message start event by double-clicking it. We name ours Order Received.
Phase 4: Building the Workflow
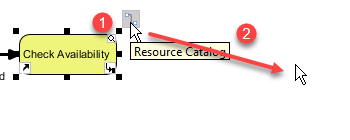
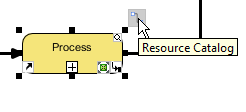
Step 5: Adding Your First Task
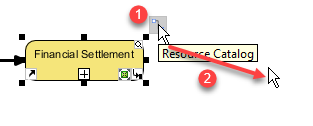
To create a task after Order Received, select Order Received, click and hold the Resource Catalog button, then drag the cursor to the desired location and release. In the popup window, select Task. You can double-click the task to rename it. We name this task Check Availability.

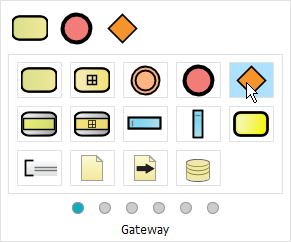
Step 6: Introducing Decision Points
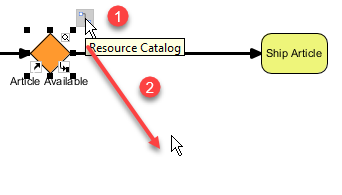
We would like to have a gateway after Check Availability. Select Check Availability, click and hold the Resource Catalog, drag the cursor to the desired location and release. Select Gateway from the popup window. Name the gateway Article Available.
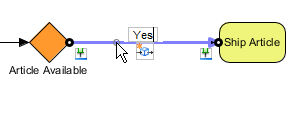
Step 7: Creating Conditional Paths
Create a task named Ship Article after Article Available using the method similar to Step 5. Double-click the sequence flow between Article Available and Ship Article and rename it to Yes.
Step 8: Handling Alternative Paths
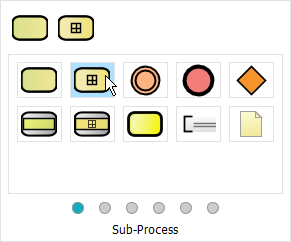
Create a sub-process named Procurement after Article Available with the sequence flow called No. Click Article Available, click and hold Resource Catalog, drag to desired location and release. Select Sub-Process from the popup window, double-click the sub-process to rename to Procurement. Name the sequence flow No.
Step 9: Connecting the Flow
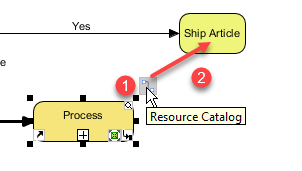
Select Procurement, click and hold Resource Catalog, drag to Ship Article and release to create a flow between Procurement and Ship Article.
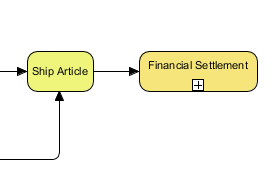
Step 10: Continuing the Process
Create a sub-process after Ship Article named Financial Settlement using Step 8’s method.
Phase 5: Managing Exceptions and Events
Step 11: Adding Error Handling
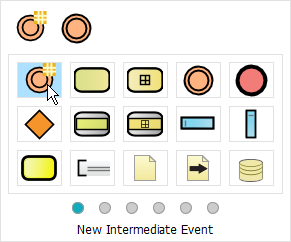
We would like to create an error intermediate event named Deliverable on Procurement. Click Procurement > Resource Catalog, then select New Intermediate Event from the popup window.
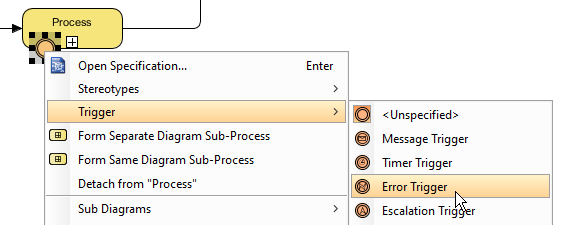
Step 12: Configuring Error Triggers
Right-click the newly created intermediate event > Trigger > Error Trigger. Name the error intermediate event Deliverable.
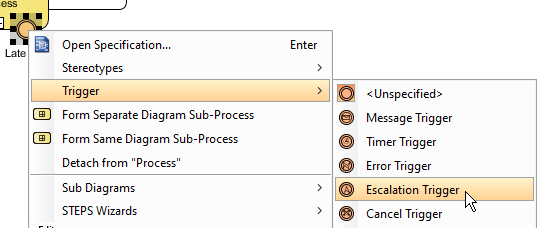
Step 13: Adding Escalation Events
Create an escalated intermediate event called Late Delivery using the same method as Steps 11 and 12. However, when repeating Step 12, select Escalation Trigger instead.
Step 14: Expanding Your Process
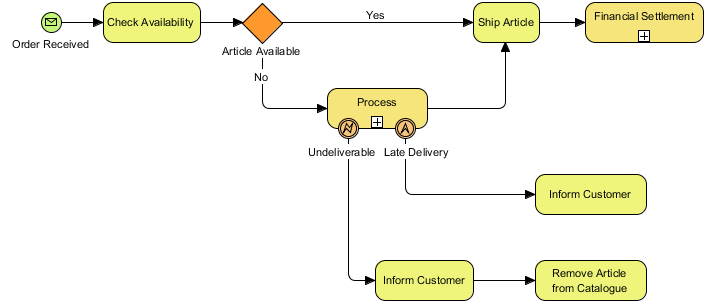
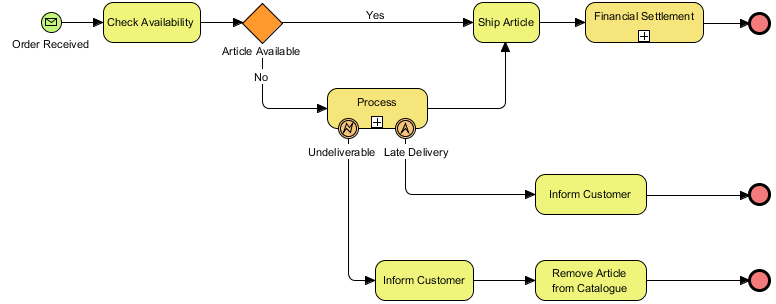
You can create more tasks using Step 5’s method. You should see something like this after creating more tasks:
Phase 6: Completing the Journey
Step 15: Reaching the End
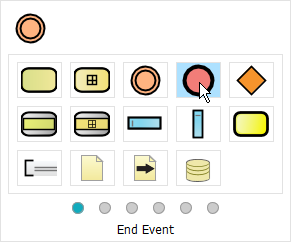
Now we can create an end event after Financial Settlement. Select Financial Settlement, click and hold Resource Catalog, drag to desired location and release, then select End Event from the popup window.
Step 16: Multiple Endings
Create two more end events, one after both Inform Customer and Remove Article from Catalogue, repeating Step 15.
Step 17: Your Masterpiece
You should now see a diagram similar to this:
Your Journey’s End: Key Takeaways
Congratulations! You’ve successfully navigated the BPMN landscape. Remember:
-
Start simple – Focus on the 4 basic elements
-
Use the Resource Catalog – It’s your fastest path to building diagrams
-
Name everything – Clear labels make your diagrams understandable
-
Handle exceptions – Use intermediate events for errors and escalations
-
Practice – Most processes only need common elements
You’re now equipped to model business processes effectively!
References
How to Draw BPMN Diagram?: Comprehensive guide on creating BPMN diagrams covering the basics of workflow development and process modeling fundamentals.
BPMN is hard to learn?: Addresses common misconceptions about BPMN complexity and explains the simplicity of the four core elements: Events, Activities, Gateways, and Flow.
Drawing a business process diagram: Step-by-step tutorial demonstrating how to create a complete Order Fulfillment business process diagram using Visual Paradigm, including start events, tasks, gateways, sub-processes, intermediate events, and end events.
Summary: 5 Key Points for Learning BPMN
• Master the 4 Basic Elements: Focus on Events, Activities, Gateways, and Flow connectors – these core components are all you need for most business process models, making BPMN far simpler than critics suggest.
• Start with Message Events: Begin your diagrams with properly configured start events (like Message Start Events) and always name them clearly to establish context for your entire process flow.
• Build Tasks Sequentially: Use the Resource Catalog feature to quickly add tasks and activities, connecting them with sequence flows and labeling each step to show the progression of work.
• Implement Decision Gateways: Create gateways to handle branching logic in your processes, labeling outgoing flows (like “Yes”/”No”) to show different paths based on conditions or decisions.
• Handle Exceptions and Endings: Add intermediate events for error handling and escalations, and complete your process with multiple end events to show all possible process conclusions.